Bulk URL monitoring: track changes across your URL list
Updated November 1, 2026
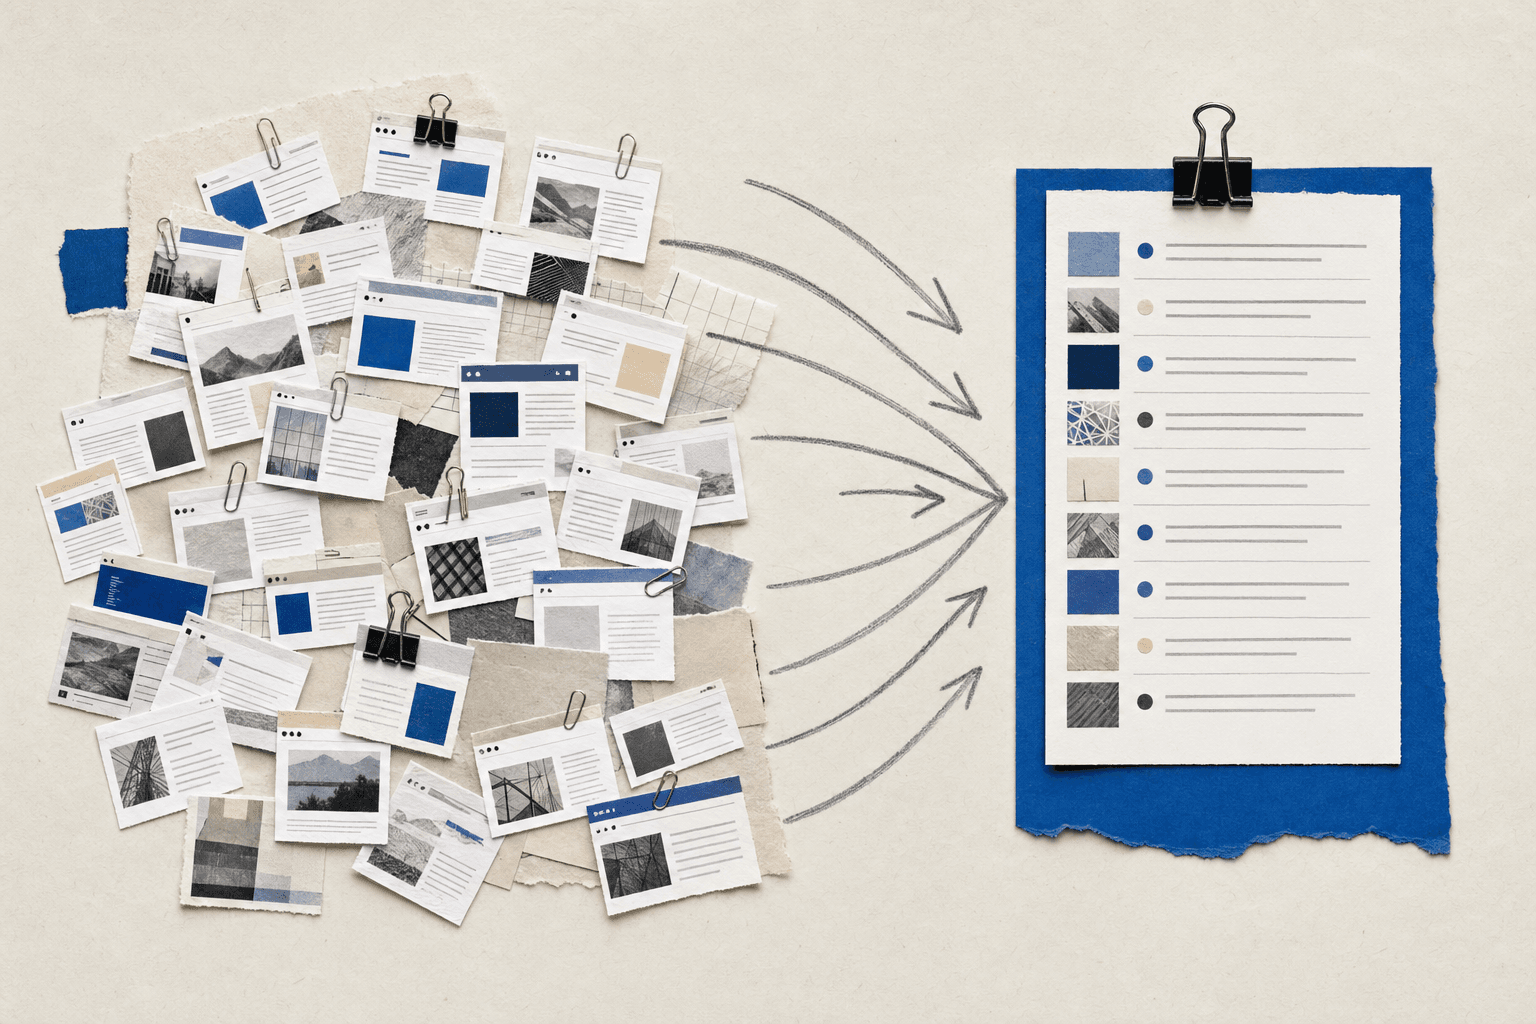
Bulk URL monitoring turns a list of webpages into separate monitors that share one set of settings. Paste URLs from a spreadsheet, describe the changes you care about once, and Visualping checks every page on your schedule.
This guide imports five competitor pricing pages in one go, with an alert condition that flags price and plan changes.
What bulk URL monitoring does
A bulk import creates one monitor per URL. Each monitor checks its page on a schedule, compares the new capture with the last one, and alerts you when a change matches your condition.
It suits any team that already has a list of pages to watch:
- A pricing or product team tracking competitor pricing pages
- A compliance team following agency update pages for regulatory monitoring
- A web team keeping an eye on its own published policies
Group pages that can share settings, such as a pricing group and a policy group, and import each group separately.
Build your URL list
Put the page address in the first spreadsheet column and a descriptive title in the second. Our grant tracker template uses the same layout. A title like Competitor A - Pricing - US names the company, page and region, so you can tell monitors apart at a glance. If you leave a title blank, Visualping fills it in from the page.
The steps below use this list of five test sites we built, so the companies are fictional:
| Page address | Title |
|---|---|
https://pemberlark-demo.pages.dev/pricing | Competitor A - Pricing - US |
https://northcask-demo.pages.dev/pricing | Competitor B - Pricing - US |
https://quillfen-demo.pages.dev/plans | Competitor C - Plans - US |
https://pallowby-demo.pages.dev/pricing | Competitor D - Pricing - US |
https://corvisle-demo.pages.dev/pricing | Competitor E - Pricing - US |
How to set up bulk URL monitoring
Before you import, load one page from the group on the Single tab and check that the content you care about shows in the preview. The Bulk sidebar has no Actions section, so pages that need clicks, typing or a login take an extra step: set them up on the Single tab, or import them and add Actions afterwards with bulk editing. Pages with different login steps belong in separate groups. The monitor setup guide covers the Single tab.
Step 1: Open the Bulk tab
Switch to the workspace where the monitors belong (Start monitoring is disabled in the all-workspaces view). Click the arrow next to Start monitoring and choose Bulk. Bulk needs a computer: phone-sized screens show only Discovery and Single.
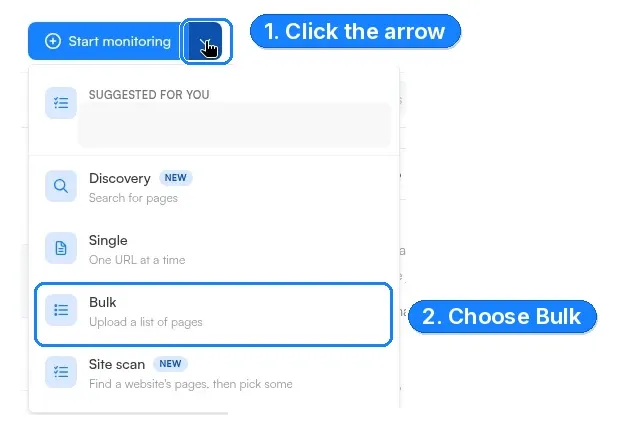
1. Click the arrow beside Start monitoring. 2. Choose Bulk.
Step 2: Paste your URLs and titles
Copy both spreadsheet columns and paste them under Paste or type the pages you want to monitor. Each row gets a Page address and a Title, and you can edit or remove any row in place.
Invalid URLs are marked so you can fix them. Orange rows are duplicates, either already monitored in this workspace or listed twice. Any you leave in become separate monitors, so click Clear all to remove them.
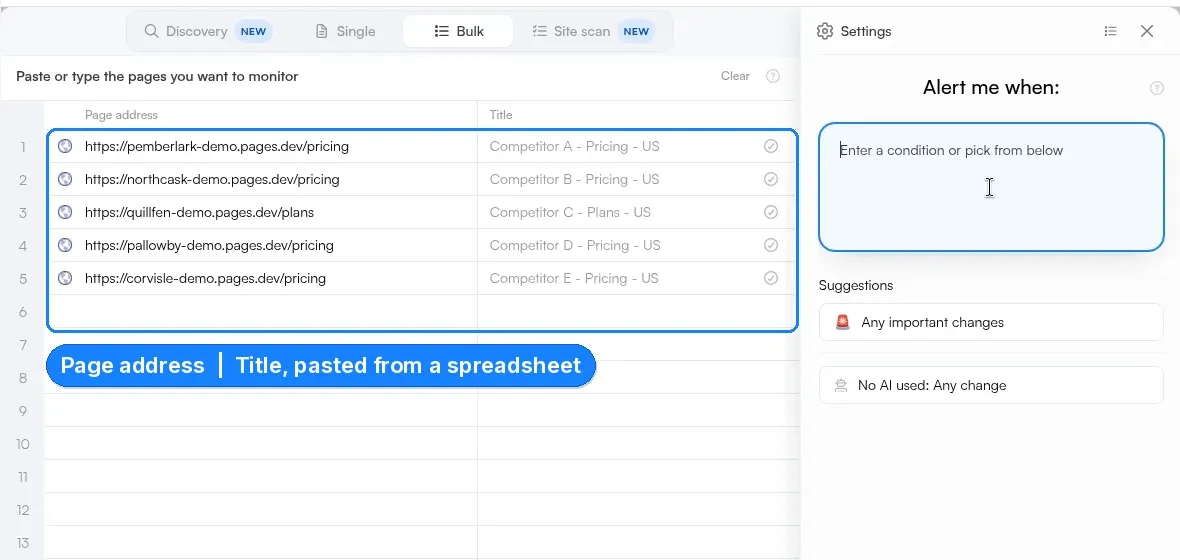
Page address and Title, pasted from a spreadsheet: one row per pricing page.
Step 3: Choose the shared settings
Once the list has a valid row, the settings sidebar slides in. Its settings apply to every page.
In Alert me when, describe the changes that matter in plain language. For our pricing group:
Alert me when a listed price, plan name, billing period, trial length or usage limit changes, or a plan is added or removed. Ignore cookie banners and the copyright year. In the summary, name the plan and give the old and new values.
Then set Check to match how soon someone needs to act on a change. We chose Every day. Frequencies under 15 minutes are locked when you add several monitors at once; set up a page that needs faster checks on the Single tab.
Click More settings to show Schedule, Notifications, Labels and Advanced. Email alerts go to your account address, and labels you add here go on every monitor in the group.
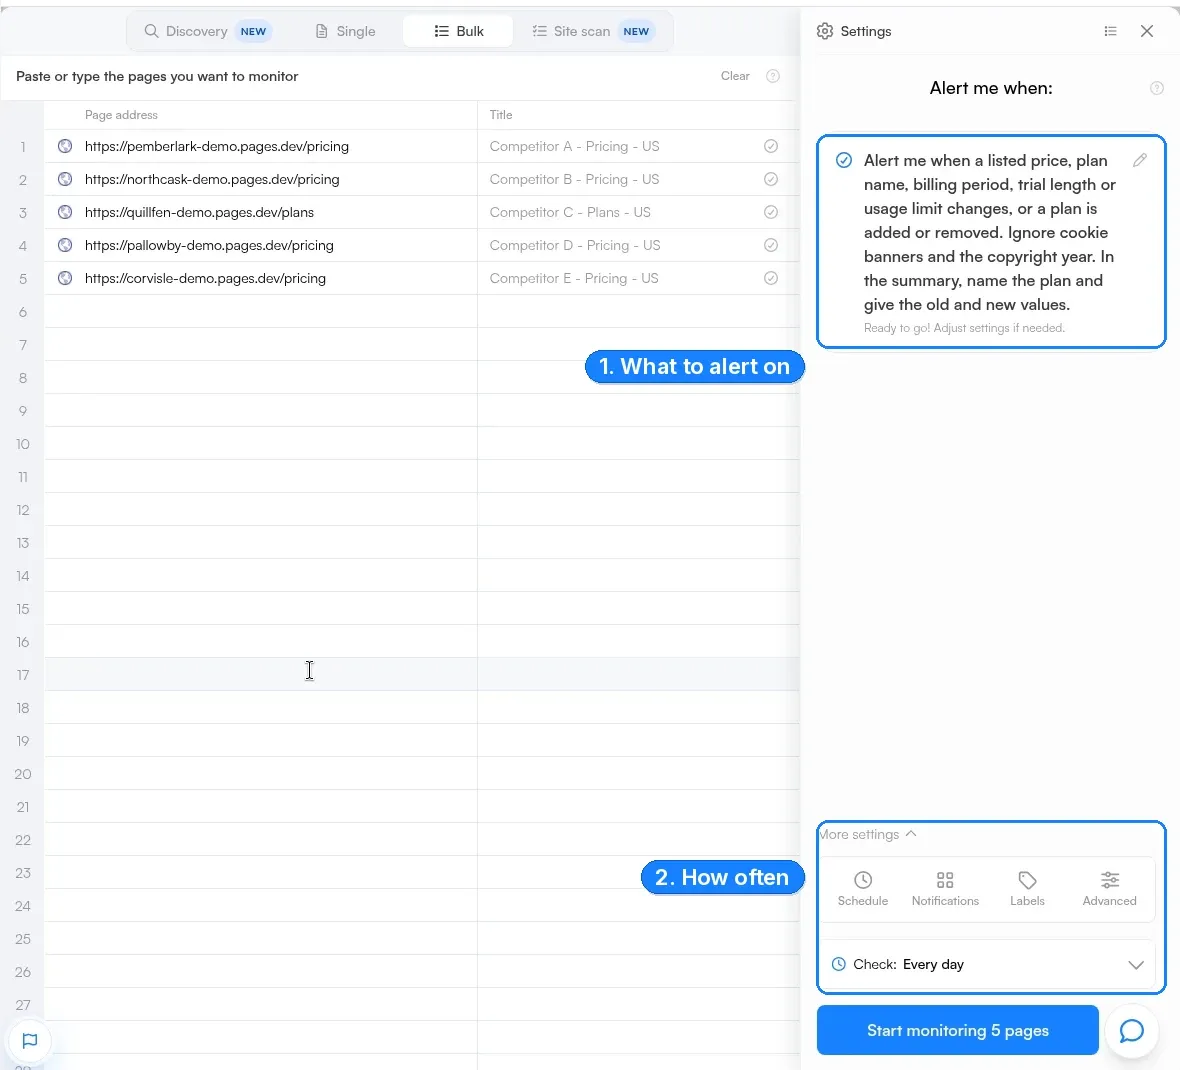
1. What to alert on: one condition for all five pages. 2. How often: Every day.
In Advanced, keep Alert me only when the AI condition is met on (it's on by default). With it off, every change sends an alert. The same panel has Wait Time and Block ads and cookie banners for slow pages and cookie pop-ups.
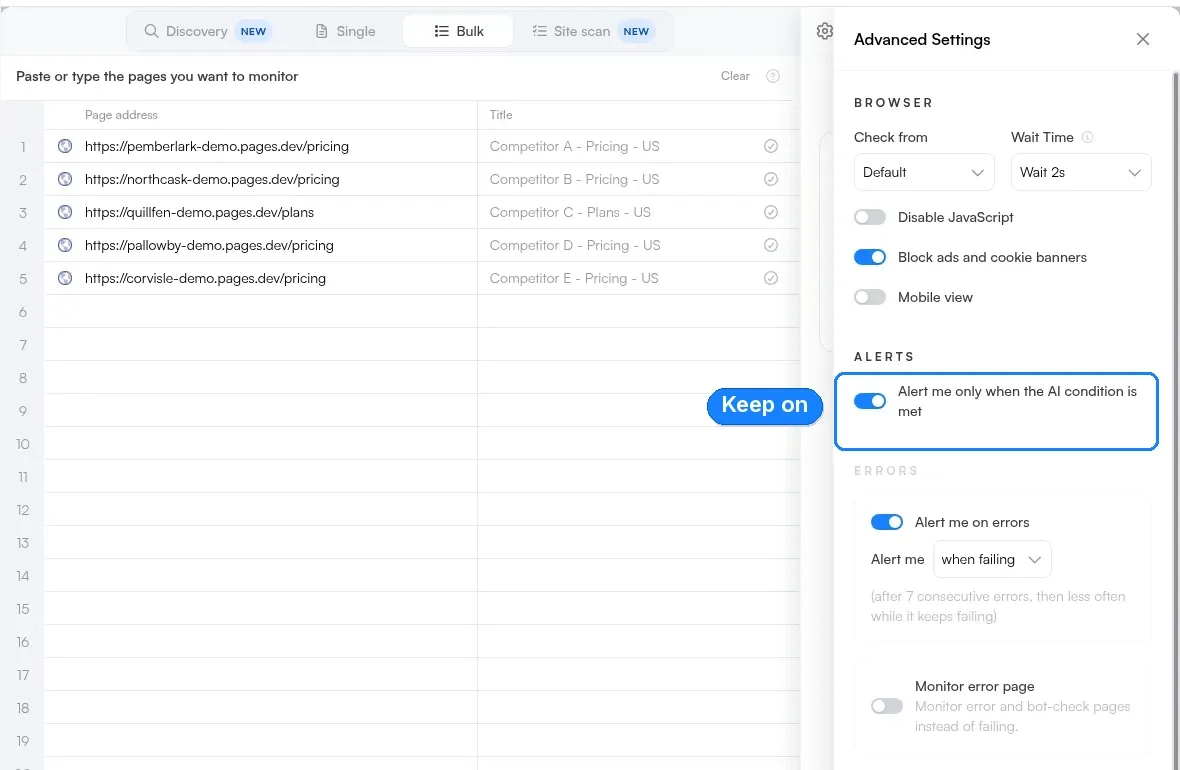
Keep on: Alert me only when the AI condition is met, under Advanced Settings.
The AI prompt guide has more examples of strong conditions.
Step 4: Start monitoring
Click Start monitoring 5 pages. If the list goes over your active page limit, you'll see a warning and need to shorten it.
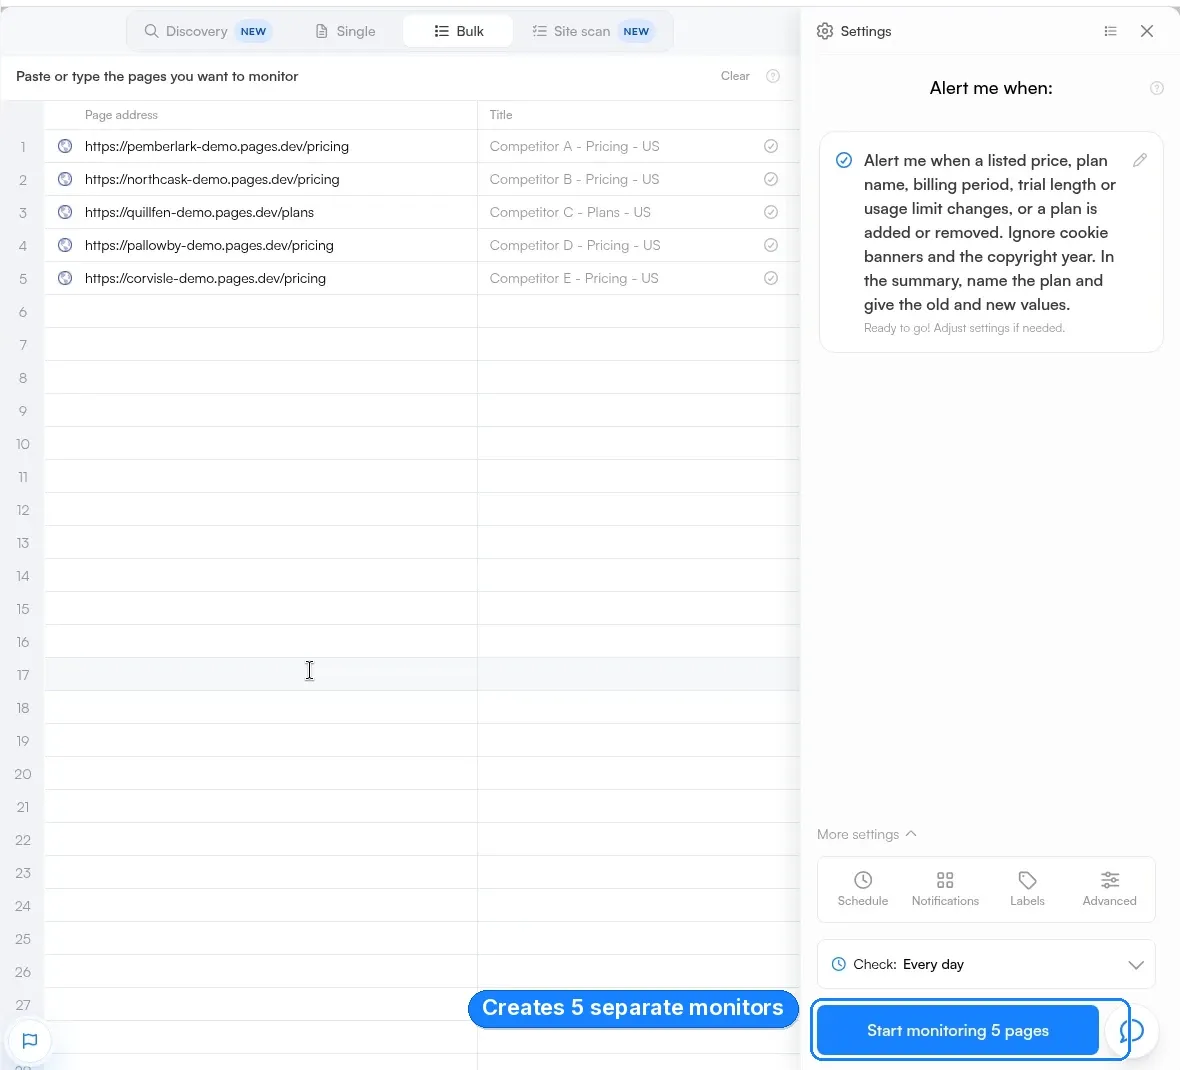
Start monitoring 5 pages creates 5 separate monitors.
Step 5: Check the new monitors
The new monitors appear under Active pages, each named from your title column. Open a few and check that the first capture shows the prices, since it's the baseline for future comparisons.
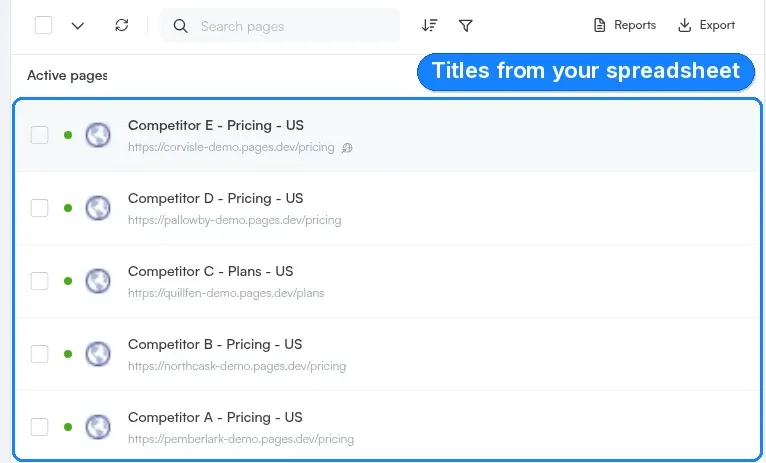
Titles from your spreadsheet: each row is now its own monitor.
What a pricing alert looks like
After the import, we raised the Team plan price on one test page (Northcask) from $49 to $59 a month and removed its 14-day free trial. On the next check, Visualping marked the change Important and summarized it:
The Team plan increased from $49 to $59 per month, and its included 14-day free trial was removed (no new trial length is stated).
That covers the plan and its old and new values, as the condition asked. Under the summary, Important criteria shows the condition the change was judged against.
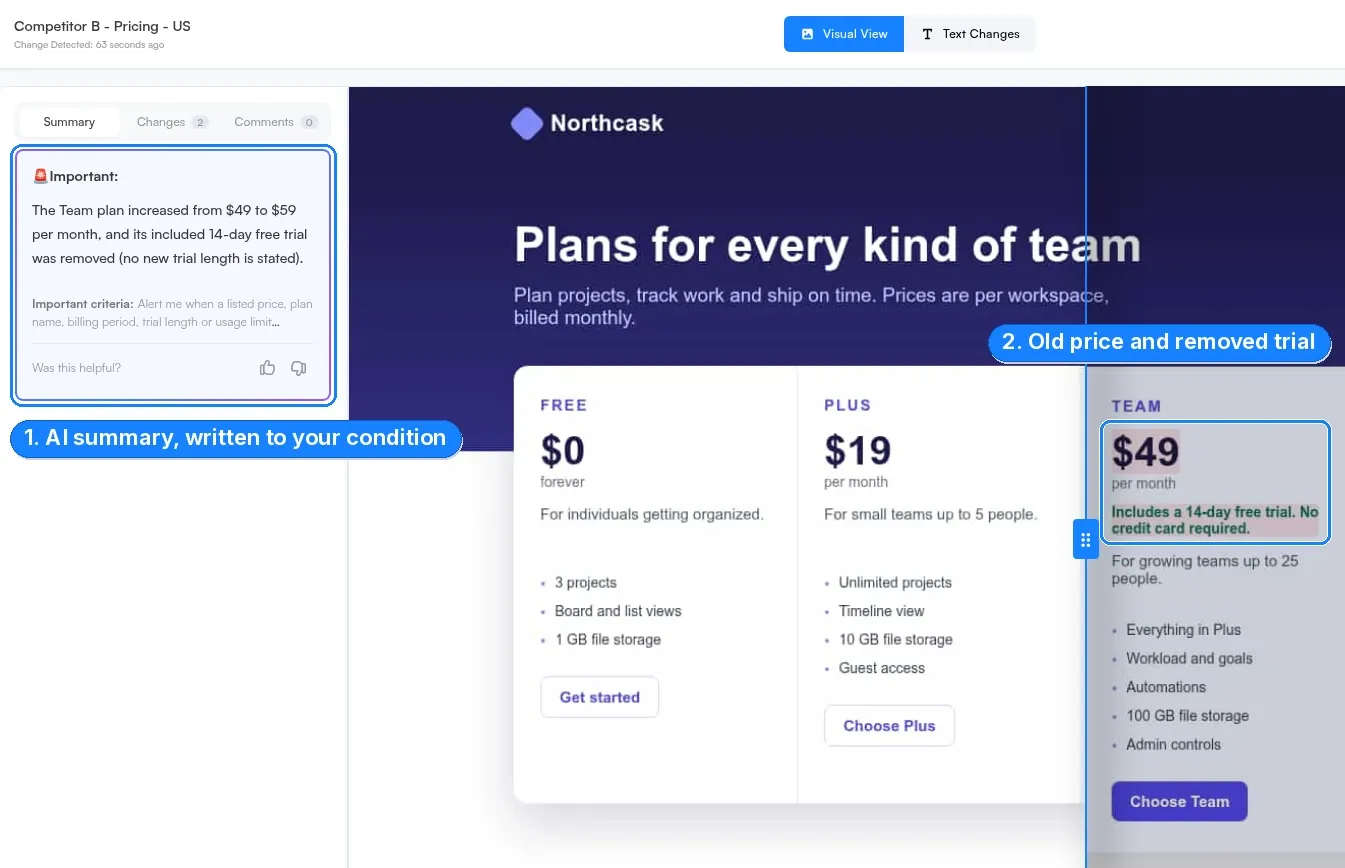
1. AI summary, written to your condition. 2. Old price and removed trial, highlighted on the page.
If alerts are noisy or miss changes, check the capture first, then tighten Alert me when.
Budget your checks
Your active page limit and your check allowance are separate limits. Each check uses one from your allowance, so multiply pages by checks per day. For 400 pages over 30 days:
| Schedule | Checks |
|---|---|
| All 400 pages daily | 12,000 |
| 20 key pages hourly, 380 daily | 25,800 |
Visualping only sees a change when a check runs, so a page that changes and changes back between checks may not trigger an alert. Compare your estimate with the allowance on the pricing page.
Good to know
- Bulk monitors the full page. For a cropped area or a single element, set the monitor up on the Single tab.
- History is kept for 90 days by default. You can lengthen data retention in Advanced settings, for new captures from then on.
- Failed checks still use your allowance, so fix persistent errors before leaving a large group running.
- Bulk edits replace Actions and labels: whatever you add becomes the full list on every selected monitor.
Organize, report and route alerts
Workspaces separate clients or departments and control who sees which monitors. Labels such as Competitor A and Pricing make monitors easy to filter and report on. Give each group an owner who reviews alerts and removes obsolete URLs.
Reports send a daily, weekly or monthly digest of changes for the monitors you choose, and Report Summary & Analysis adds an AI overview. See the Reports guide.
Alerts can go to email, webhooks, Slack, Microsoft Teams, Discord or Google Sheets, and a webhook can trigger a Zapier automation. The notification settings guide covers setup.
Update existing monitors in bulk
To change monitors you already have, open a single workspace on a desktop or laptop, tick the monitors and click Settings in the toolbar. You can update the alert condition, frequency, schedule, Actions, notifications, labels and advanced settings for the whole selection. The bulk editing guide lists every supported field.
This is also how you add Actions to monitors created in Bulk: select the group, open Actions and add the clicks, waits or login steps once.
Deleting monitors to re-import them with new settings loses them for good: deleted monitors can't be restored, and their history goes with them.
Troubleshooting
The capture is incomplete or shows a login screen
Open the latest capture to see where it stopped. A slow page may need a longer Wait Time; overlays, scrolling and logins need Actions. Run a check afterwards to confirm the fix. Our Action sequence guide walks through each step. If a site asks for a fresh two-factor code at every login, contact support before importing its other pages.
Checks are failing
Outages, access blocks, expired logins and redesigns can all cause failures. For bot checks or geo-blocks, try a checking location in the site's own country under Advanced > Check from. Alert me on errors, also under Advanced, tells you when a page keeps failing. If a page loads in your browser but keeps failing in Visualping, send support the monitor ID, the time of a recent failed check and what the page should show.
Frequently asked questions
How many URLs can I import at once?
As many as your active page limit allows. Smaller groups with shared settings are easier to check after import.
Can I use alerts and scheduled reports together?
Yes. Use alerts for changes that need quick action and a scheduled report for periodic review.
How do I keep monitoring traffic out of my site's analytics?
Choose Fixed checking location under Advanced settings > Check from. It uses a known IP address you can filter out. The current address is in the checking location guide.
Related reading
Monitor your whole URL list
Paste your list, write one alert condition for every page, and get an AI summary when a change matches it.
Eric Do Couto
Eric Do Couto is the Head of Marketing at Visualping. He leads content strategy, growth operations, and brand positioning for website change detection.
More articles by Eric Do Couto